
Disclosure: This article is part of a paid partnership with OEDRO through the Amazon Associates Creator Connections program. We may earn a commission for purchases made through the links in this content, at no additional cost to you. As always, opinions expressed here are honest and based on our experience with the product.
OEDRO running boards are a practical and stylish addition to your Toyota 4Runner, offering accessibility and a rugged aesthetic. This article combines a detailed product review with a step-by-step installation guide and a comparison to rock sliders to help you make an informed choice for your SUV.
Celebrate the holiday season with OEDRO's biggest sale of the year! Santa has picked the best deals on auto accessories, including these high-quality running boards for the Toyota 4Runner. Perfect for upgrading your vehicle, preparing for winter, or gifting an auto enthusiast, these running boards are a must-have this holiday season.
Product Review: OEDRO Running Boards
Advantages
-
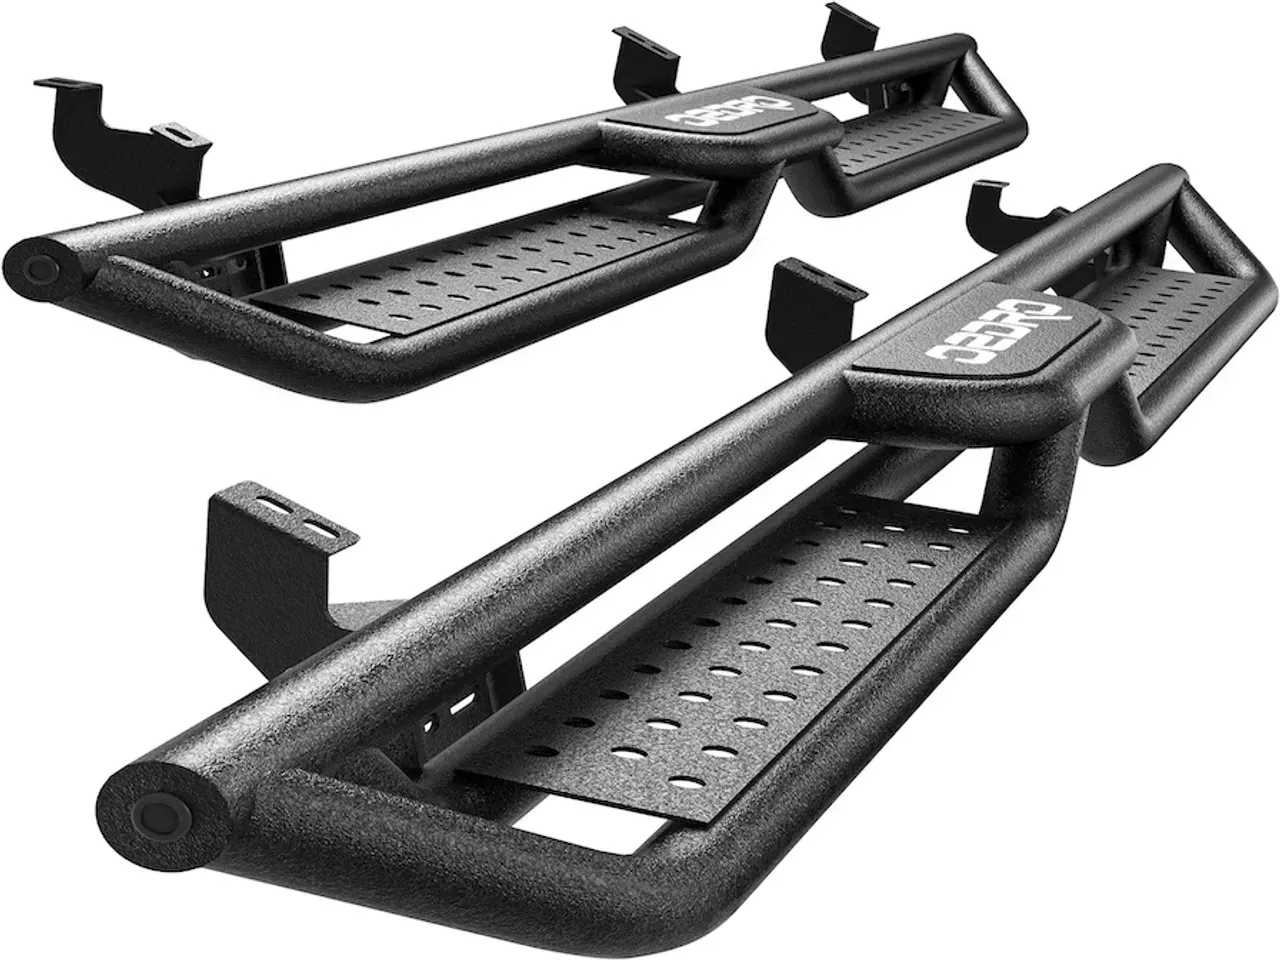
High-Quality Construction:
- Made of rust-resistant carbon steel with a durable black powder-coated finish.
- Built to withstand harsh conditions while maintaining a sleek appearance.
-
Enhanced Accessibility:
- Features a 3.5-inch drop step, making it easier for children and elderly passengers to enter and exit the vehicle.
- Provides a higher step for convenient access to the roof for loading gear or cleaning.
-
Stylish Design:
- Black and red color combination offers a modern, rugged look.
- Paintable step plates allow for further customization to match your vehicle’s aesthetics.
-
Easy to Clean:
- Geometric plate panels prevent mud buildup and make cleaning effortless.
-
Straightforward Installation:
- Includes pre-welded brackets and requires no cutting or drilling.
- Minimal hardware simplifies the process and reduces installation time.
-
Compatibility:
- Designed specifically for the Toyota 4Runner (2010–2024 models), ensuring a perfect fit.
Considerations
-
Optimized for Everyday Use:
- Best suited for light off-road or daily driving. For heavy-duty protection, rock sliders may be a better choice.
-
Body-Mounted Design:
- As with all running boards, a direct impact could bend the vehicle's body panels. Consider your typical driving terrain when deciding.
Running Boards vs. Rock Sliders
Key Differences
-
Mounting Location:
- Running Boards: Attach to the body of the vehicle, prioritizing accessibility and style.
- Rock Sliders: Bolted or welded to the frame, designed to protect the vehicle during off-road impacts.
-
Purpose:
- Running Boards: Provide convenience for passengers and improve aesthetics.
- Rock Sliders: Shield the rocker panels and body from heavy impacts on rocky terrain.
Step-by-Step Installation Guide
Tools You’ll Need
To ensure a smooth installation, gather the following tools:
- 12mm, 13mm, 16mm socket – Ideal for tackling a variety of bolts. We recommend the CRAFTSMAN Mechanics Tool Set for its durability and range of sizes.
- 16mm wrench – Necessary for securing brackets. Consider the CRAFTSMAN Combination Wrench Set, Metric for a reliable, ergonomic option.
- Ratchet – Perfect for tightening bolts efficiently. A standard ratchet will work, but ensure it’s compatible with your socket set.
- Torque wrench – Crucial for precise tightening to avoid overtightening or under-tightening bolts. The CRAFTSMAN Torque Wrench, 1/2" Drive is a great choice for accuracy.

Parts List
- (1) Driver’s side front bracket
- (2) Driver’s side center/rear brackets
- (1) Driver's side step bar
- (1) Passenger side front bracket
- (2) Passenger side center/rear brackets
- (1) Passenger side step bar
- (12) M8x25 Hexagon Flange Bolts
- (12) M10x30 Hexagon Bolts
- (12) M8x24 Flat Washers (Zinc Plated)
- (24) M10x25 Flat Washers
- (12) M10 Lock Washers
- (12) M10 Hexagon Nuts


Before Installation
- Review the instructions carefully before installation.
- Gather the proper tools and ensure necessary safety equipment is applied.


Step 1: Locate Mounting Positions
- Locate mounting positions on each side of the 4Runner.
- Remove factory bolts from the mounting positions.
- Clean the sealant and dirt around the mounting positions.


Step 2: Install Brackets
- Attach the mounting brackets to the rocker panel and secure with (2) M8 hex bolts and (2) M8 flat washers per bracket.
- Repeat this process to install all brackets but do not fully tighten to allow for adjustment later.
Pro Tip: Keep bolts loose initially for easier alignment adjustments during later steps.


Step 3: Attach Step Bars
- With assistance (or using a jack), lift and attach the step bar to the brackets.
- Secure the step bar on the brackets with:
- (6) M10 hex bolts
- (12) M10 flat washers
- (6) M10 lock washers
- (6) M10 hex nuts
- Repeat to install the other side, but do not fully tighten.

Step 4: Final Tightening
- Tighten M8 hex bolts to the 4Runner with 15 ft. lbs. torque.
- Adjust the step bar to level and tighten M10 hex bolts and nuts to 31 ft. lbs. torque.
- After installation, periodically check to ensure all mounting hardware remains secure and tight.


Conclusion
OEDRO running boards are a valuable addition to your Toyota 4Runner, combining durability, style, and practicality. Take advantage of OEDRO's holiday sale to upgrade your vehicle today!
Shop Now on Amazon and enjoy OEDRO's holiday savings! As an Amazon Associate, we earn from qualifying purchases at no extra cost to you.
Questions or Comments?
Let us know your thoughts here