
Because a Stolen Cat is Not an Overland Mod
You just finished packing the rig for an epic weekend of trails, coffee, and questionable life choices. You hop in, turn the key, and… instead of a smooth purr, you’re met with the deafening BRAPPPPP of an unmuffled exhaust.
Congratulations, you’re the latest victim of catalytic converter theft—because apparently, stealing truck parts is a bigger industry than selling them.
With cat thefts up by over 325%, leaving your 4Runner unprotected is like leaving a steak on the hood in bear country—it’s getting taken, no questions asked. That’s where Cali Raised LED’s Catalytic Converter Shield comes in. Not only does it stop would-be thieves in their tracks, but it also installs easily, doesn’t rattle, and looks clean.
Why Cali Raised LED is the Best in the Game
Cali Raised LED didn’t just make a cat shield—they engineered one. Here’s why it’s miles ahead of the competition:
- 12-gauge stainless steel construction – Durable, rust-resistant, and a nightmare for thieves trying to cut through it.
- True bolt-on installation – So easy you could do it blindfolded in the middle of a trail repair (but maybe don’t).
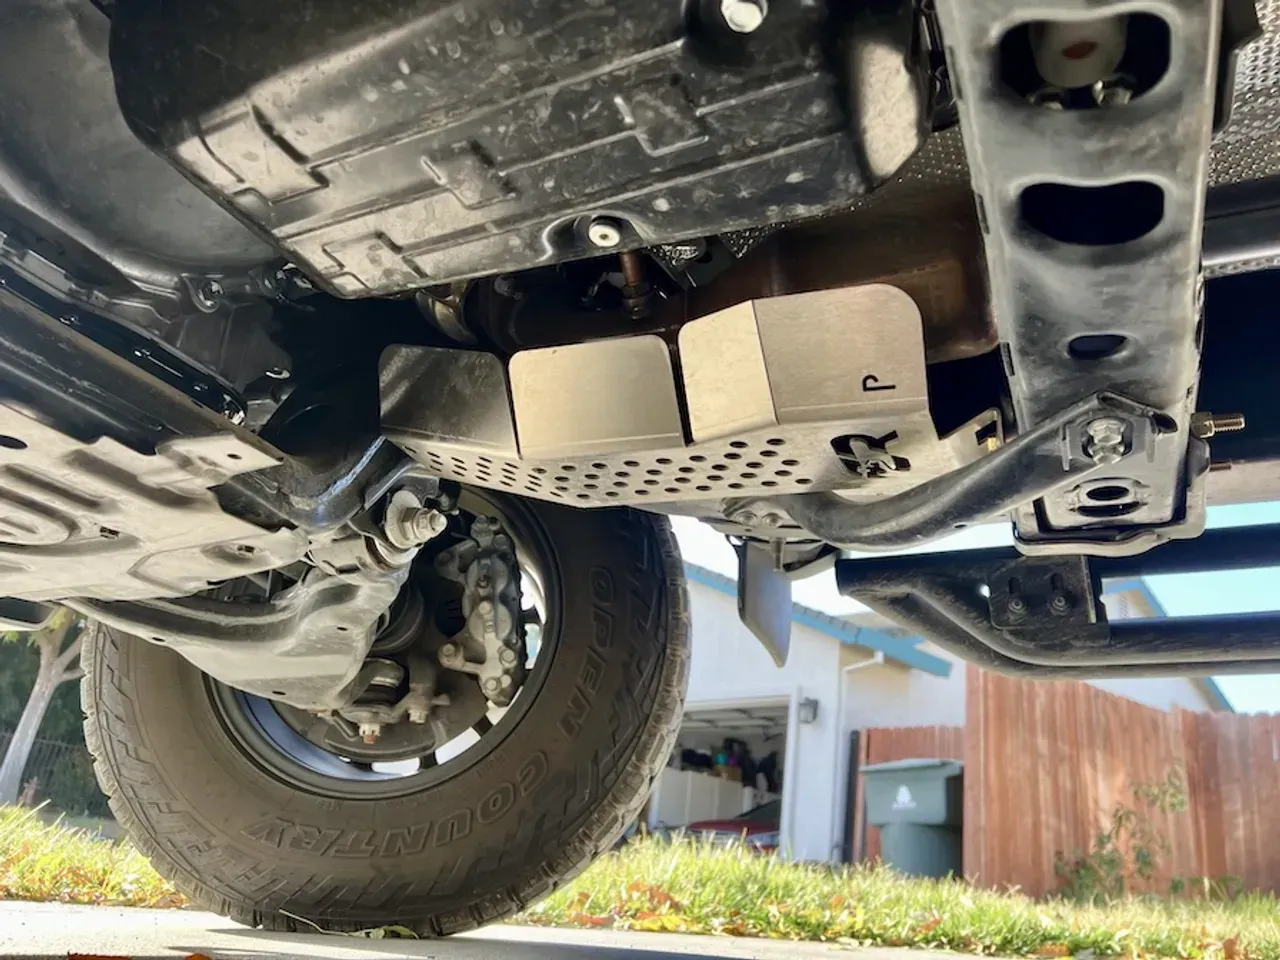
- Perfect airflow design – Circular holes optimize airflow, preventing excessive heat buildup while still providing security. Unlike shields with larger gaps that can expose parts of the catalytic converter, this design keeps it both cool and fully protected.
- Zero rattles – Unlike shields that rattle like a bag of trail mix in your center console (looking at you, Millercat), this one stays quiet and secure.
- Military and veteran discounts – Because they take care of their customers.
- High-quality hardware – Comes with actual torque-rated bolts, unlike certain competitors that shall not be named.
- Free shipping and no sales tax – Saving money so you can buy more mods.

What You Need: Just the Basics (and Maybe a Victory Beer Afterward)
Parts Included:
- (1) Cali Raised LED Catalytic Converter Shield
- (1) Installation hardware pack (torque-rated bolts, washers, spacers)
Tools Required:
- 12mm, 14m sockets – Ideal for tackling a variety of bolts. We recommend the CRAFTSMAN Mechanics Tool Set for its durability and range of sizes.
- Ratchet – Perfect for tightening bolts efficiently. A standard ratchet will work, but ensure it’s compatible with your socket set.
- Torque wrench – Crucial for precise tightening to avoid over tightening or under-tightening bolts. The CRAFTSMAN Torque Wrench, 1/2" Drive is a great choice for accuracy.
- 12mm, 14mm wrenches – Necessary for securing brackets. Consider the CRAFTSMAN Combination Wrench Set, Metric for a reliable, ergonomic option.
- Pick tool – Makes inserting rubber bumpers easier We recommend the Craftsman Pick set.
Installing Your Shield: A 10-Minute Project That’ll Save You $2,500 Later
Step 1: Install Rubber Bumpers
- Locate the designated holes for the rubber bumpers.
- Push the smaller end of the rubber bumper through until it locks in place.
💡 Pro Tip: Use a pick tool to pull the bumper through if it’s being stubborn.
Step 2: Remove the Front Tube Support
- Locate the front tube support (under the vehicle).
- Use a 12mm socket to remove the two rear bolts and the two front bolts.
Step 3: Remove Transmission Crossbar Nuts
- Identify the two nuts securing the transmission crossbar.
- Use a 14mm socket to remove them.
Step 4: Replace Crossbar Bolts
- Remove one bolt at a time (to avoid dropping the transmission).
- Insert the supplied M8 bolt with washer and aluminum spacer through the crossbar.
- Secure it loosely to allow for adjustments.
- Repeat on the second bolt.
Step 5: Prepare for Shield Installation
- Push both bolts in the crossbar all the way forward to allow clearance for the shield.
- Optionally, thread a bolt lightly into the crossbar to make alignment easier.
Step 6: Install the Catalytic Converter Shield
- Position the shield so the front aligns with the lower control arm bolt and the rear aligns with the crossbar bolts.
- Insert the first security bolt with a washer through the shield and secure it loosely.
- Add the second security bolt in the same manner.
- Tighten the crossbar bolts to pull the shield into position.
- Secure all bolts tightly.
Step 7: Repeat for Passenger Side
- Follow the same process for the passenger side installation.
Step 8: Final Checks
- ✔️ Verify all bolts are torqued to spec (35 ft-lbs).
- ✔️ Ensure the shield is securely fastened and doesn’t interfere with other components.
- ✔️ Admire your work and hit the trails with peace of mind.
Final Verdict: A Must-Have for Any 4Runner Owner
Your Toyota 4Runner deserves the best. Whether you’re overlanding, rock crawling, or just dodging shopping carts at Costco, this shield makes sure your rig stays loud on purpose—not because someone jacked your cat.
Protect your 4Runner today—get a Cali Raised LED Shield!
Disclosure
This post is not sponsored by the manufacturer mentioned in the article. I personally purchased the Cali Raised LED catalytic converter shield to provide an unbiased review. My experience highlights why choosing the right product matters. This firsthand experience reinforces the importance of investing in a reliable product like Cali Raised LED, which delivers superior quality and customer care.
Questions or Comments?
Let us know your thoughts here