Imagine This: Worry-Free Off-Roading
Picture this: You’re gearing up for an off-road adventure in your 4Runner, only to discover your catalytic converter is gone—stolen in mere minutes. With catalytic converter thefts skyrocketing by over 325% in recent years, this is a harsh reality for Toyota 4Runner owners. The good news? A robust shield can protect your investment and peace of mind. But which is better: Cali Raised LED or Millercat? Let’s dive in and find out.
Quick Comparison: Cali Raised LED vs. Millercat
| Feature | Cali Raised LED | Millercat |
|---|---|---|
| Price | $189 | $250 |
| Material | 12-gauge stainless steel | 12-guage or 16-guage stainless steel or Aluminum |
| Installation | True bolt-on, no assembly required | Assembly required and Bolt-on |
| Hardware Quality | Superior hardware improves stability and security beyond the original design. | Weak bolts that cannot hold up to torque specifications, leading to potential failures. |
| Heat Dissipation | Circular holes for airflow | Minimal heat management |
| Noise and Stability | Silent operation, enhanced vehicle stability | Noisy, potential rattling issues |
| Discounts | Veterans and military discounts | None |
| Customer Service | Prompt response, Free shipping | Poor service, restocking fees |
Why Choose Cali Raised LED?

Customer Perks That Make a Difference
Cali Raised LED offers free shipping within the lower 48 states, no sales tax, and even discounts for veterans and military personnel. Their customer service is top-notch, with no hidden fees or restocking charges. In contrast, Millercat has faced criticism for poor customer service and a hefty restocking fee policy.
Price
At just $189, the Cali Raised LED Catalytic Converter Shield is not only affordable but also a great value for its superior build quality. Comparatively, the Millercat shield is priced higher at $250, making it less cost-effective.
Hardware That Stands the Test
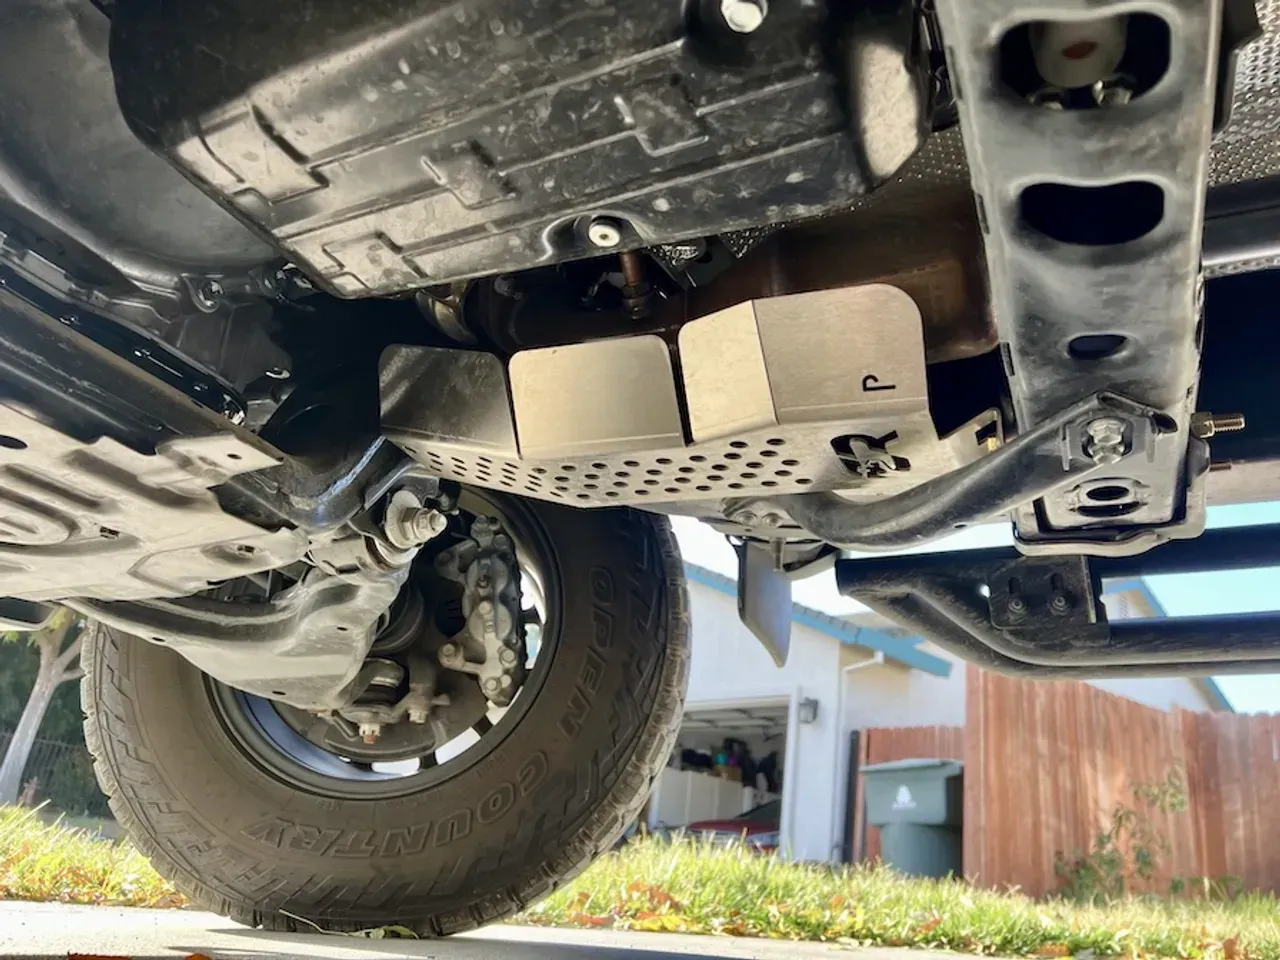
The Cali Raised LED Catalytic Converter shield is crafted from durable 12-gauge 304 brushed stainless steel, ensuring long-lasting protection. Its circular hole design prevents overheating while maintaining structural integrity. The shield's hardware is a standout feature, built to improve stability and reliability. Unlike Millercat, which has been reported to use weak bolts prone to breaking, Cali Raised LED includes high-quality components that surpass OEM standards. Below are images of broken Millercat parts showcasing their inferior quality:


Easy Installation
With a true bolt-on design, Cali Raised LED eliminates the need for drilling or modifications, making installation hassle-free. The included security hardware and tools ensure a snug and secure fit.
Quiet and Reliable
Unlike Millercat’s shield, which users have criticized for excessive noise and rattling, Cali Raised LED operates silently, maintaining the stability and performance of your 4Runner.
Customer-Centric Perks
Cali Raised LED offers free shipping within the lower 48 states, no sales tax, and even discounts for veterans and military personnel. Their customer service is top-notch, with no hidden fees or restocking charges, unlike Millercat’s reported poor service.
Installation Guide for the Cali Raised LED Catalytic Converter Shield
Tools You’ll Need
To ensure a smooth installation, gather the following tools:
- 12mm, 14m sockets – Ideal for tackling a variety of bolts. We recommend the CRAFTSMAN Mechanics Tool Set for its durability and range of sizes.
- Ratchet – Perfect for tightening bolts efficiently. A standard ratchet will work, but ensure it’s compatible with your socket set.
- Torque wrench – Crucial for precise tightening to avoid overtightening or under-tightening bolts. The CRAFTSMAN Torque Wrench, 1/2" Drive is a great choice for accuracy.
- 12mm, 14mm wrenchs – Necessary for securing brackets. Consider the CRAFTSMAN Combination Wrench Set, Metric for a reliable, ergonomic option.
Step 1: Install Rubber Bumpers
- Identify the designated hole for the rubber bumpers.
- Push the smaller end of the rubber bumper down through the hole until it locks into place. Using a pick tool can make this process easier.
Step 2: Remove Front Tube Support
- Locate the front tube support.
- Use a 12mm socket to remove the two bolts at the rear and the two bolts at the front.
Step 3: Remove Transmission Crossbar Nuts
- Locate the nuts on the transmission crossbar bolts.
- Use a 14mm socket to remove these nuts.
Step 4: Replace Crossbar Bolts
- Remove one bolt at a time to avoid destabilizing the transmission. Start with the loose bolt.
- Insert the supplied M8 bolt with a washer and aluminum spacer, pushing it through the crossbar.
- Add another washer and a lock nut on the other side. Tighten it loosely for now.
- Repeat this process for the second bolt.
Step 5: Prepare for Shield Installation
- Push both bolts in the crossbar all the way forward to allow room for the shield.
- Optionally, lightly thread one bolt into the crossbar and let it rest to simplify alignment later.
Step 6: Install the Catalytic Converter Shield
- Position the shield so the front aligns with the lower control arm bolt and the rear aligns with the crossbar bolts.
- Ensure the washers are on the front of the shield and the spacers are behind it.
- Insert the first security bolt with a washer through the shield and secure it loosely.
- Add the second security bolt in the same manner.
- Tighten the crossbar bolts to pull the shield into position.
- Secure all bolts tightly, ensuring the shield is properly aligned.
Step 7: Repeat for Passenger Side
- Follow the same steps for the passenger side installation.
Step 8: Final Checks
- Verify all bolts are securely tightened.
- Ensure the shield is properly aligned and does not obstruct other components.


Questions or Comments?
Let us know your thoughts here